How to Create Your Own Invoice from Scratch in Microsoft Excel

Microsoft Excel templates letting you down? Make your own invoice from scratch using these simple steps.
Microsoft Excel 2016 comes with a plethora of templates that are ready for you to use at the click of a button. So why make your own invoice from scratch? For one, creating your own custom invoice in Excel 2016 lets you modify and tweak the invoice to your particular needs. Second, it’s incredibly easy to do once you learn the basics of formatting and formulas. After we walk you through this tutorial on building an invoice in Excel 2016, you’ll have the skills you need to create invoices that do what you need them to do. It only takes a few minutes.
Let’s get started.
Creating a Custom Invoice Template in Excel 2016: The Big Picture
We’ll be breaking down the construction of our invoice template in Excel 2016 into several different tasks:
- Formatting the table in Excel: adding borders and sizing columns
- Adding labels and formatting headers
- Adding formulas for totals and subtotals
- Formatting numbers
- Protecting the spreadsheet
- Saving the spreadsheet as a template
That may seem complex overall, but the tasks themselves are simple if you approach them step-by-step.
Formatting an Invoice Table: Adding Borders and Sizing Columns
Formatting your invoice will require resizing columns and using the borders and the outline tool. The table you create will define the data entry points. Let’s practice a couple first.
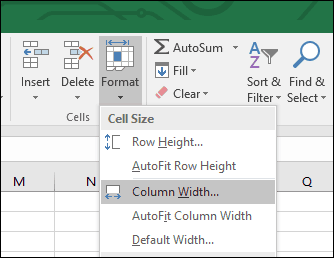
Start by resizing column A to 12 units. Select column A, then click Home, Format, Column Width and enter 12.
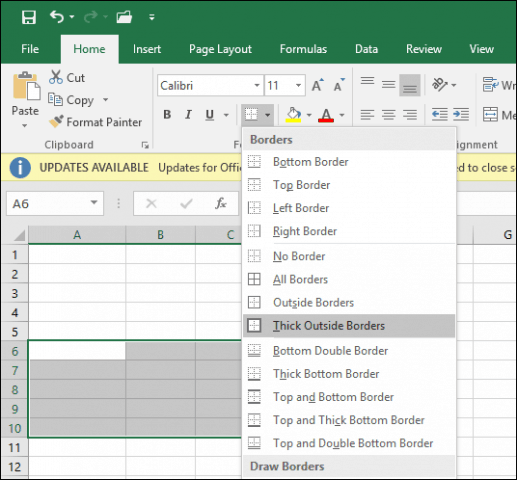
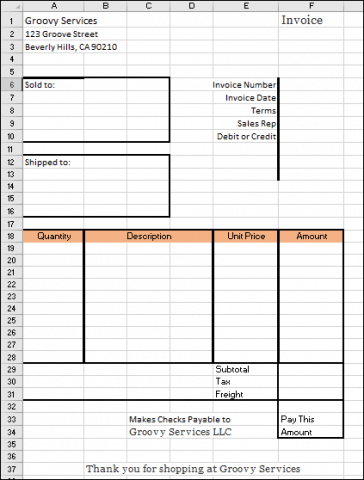
Next, create a block by selecting cell range A6:C10. Select the Home tab, click the Borders menu then select Thick Outside Borders. Create another box by selecting cell range A12:C16 then repeat the same steps to apply a thick outside border.
Now that you know how the border and outline tool works, we are going to create additional boxes within the spreadsheet for storing information. Some of these boxes will use different border styles and column sizes.
Resize column E and F to 13 units. Resize column G to 15 units.
Next, we’ll create a block from cell range F6:F13 and apply a thick border, but this time, only on the left edge. Select the cell range, then click the Borders menu, then Line Style and choose the thick line.
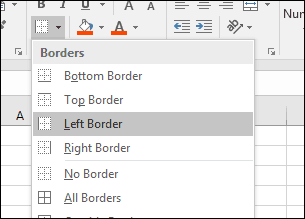
 Click the Borders menu and then choose Left Border.
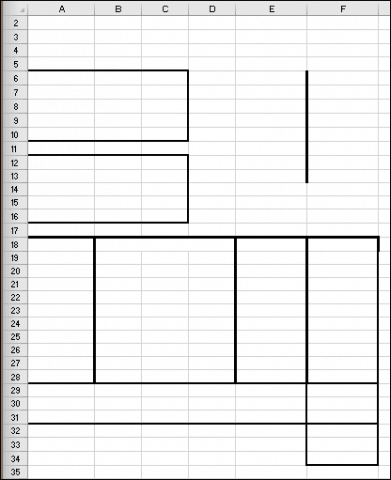
We now know how to apply borders in different styles and layouts. Follow the instructions below to design the borders for the rest of the invoice.
Block Cell Ranges | Border Style |
| A18:F28 | Click the Border menu, choose Thick Outside Borders |
| B18:B28 | Click the Border menu, choose Left |
| F18:F28 | Click the Border menu, choose Left |
| E18:E28 | Click the Border menu, choose Left |
| A29:F31 | Click the Border menu, choose Thick Outside Borders |
| F29:F31 | Click the Border menu, choose Left and Right |
| F32:F34 | Click the Border menu, choose Thick Outside Borders |
Adding Labels and Formatting Headers
The next step is to enter the labels for each cell address with appropriate alignment and font size. Here are some sample labels. You can substitute each label with your own where appropriate.
Labels | Cell Address | Alignment | Font Size |
| Groovy Services | A1 | Left | 14 |
| 123 Groove Street | A3 | Left | 12 |
| Beverley Hills, CA, 90210 | A4 | Left | 12 |
| Sold to: | A6 | Left | 12 |
| Shipped to: | A12 | Left | 12 |
| Invoice Number | E6 | Right | 12 |
| Invoice Date | E7 | Right | 12 |
| Terms | E8 | Right | 12 |
| Sales Rep | E9 | Right | 12 |
| Debit or Credit | E10 | Right | 12 |
| Quantity | A18 | Center | 10 |
| Description | B18 | Centered across columns; select B18:D18 and click Merge and Center. | 10 |
| Unit Price | E18 | Center | 10 |
| Amount | F18 | Center | 10 |
| Subtotal | E29 | Left | 10 |
| Tax | E30 | Left | 10 |
| Freight | E31 | Left | 10 |
| Pay This | F33 | Center | 10 |
| Amount | F34 | Center | 10 |
| Make Checks Payable to | C33 | Left | 12 |
| Thank you for shopping at Groovy Services | B37 | Left | 12 |
| Groovy Services LLC | C34 | Left | 10 |
| Invoice | F1 | Left | 14 |
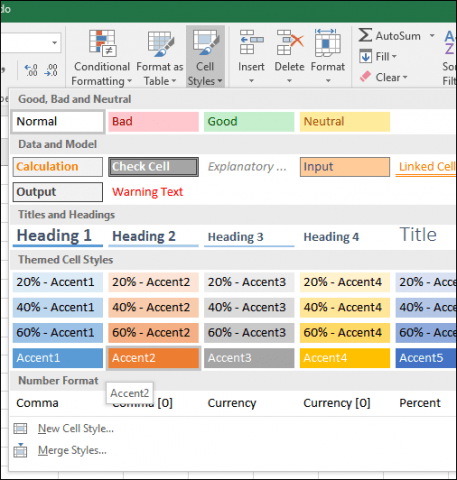
Create a block from cell range A18:F18. Under the Home tab, click the Cell Styles menu then choose the desired style for your headings. I chose the orange 60% – Accent 2.
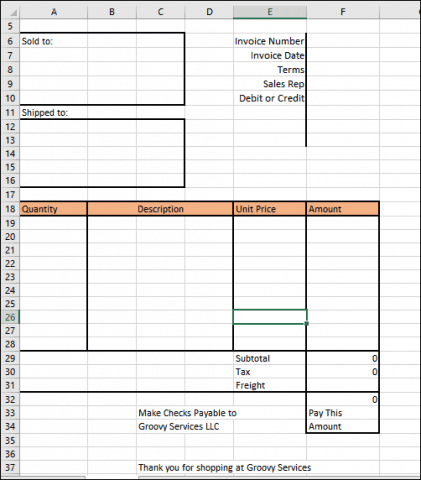
Your invoice should look like the following at this point.
Adding Formulas for Total and Subtotal Calculations
Now it’s time to bring your invoice to life. This means adding formulas that can help you calculate the cost of your goods and services. Your invoice will likely require a conditional function based on the value of a product or service selected.
The formula If(Condition, Value 1, Value 2) produces a value based on the condition. If the condition is true, then value 1 is produced. If the condition is false, then value 2 is produced.
The first formula we will enter calculates the amount. For the itemized charges table, we want to calculate the amount by multiplying the quantity (A19) by the unit price (E19). But we only want to do this if the row is filled in. Otherwise, our formula will create an error. To avoid this, we assign the amount cell (F19) a blank value if the quantity cell is blank.
In cell F19, enter =IF(A19=””,””,A19*E19). Proceed to fill the cell range F20:F28 with the formula.

Create the formula for the subtotal. In cell F29, enter =SUM(F19:F28)
![]()
To create the formula for tax, go to cell F30 and enter =F29*0.50. Swap out 0.50 for whatever your local tax rate is.
Enter the formula to calculate “Pay This Amount” in cell F32. Enter =F29+F30+F31
Formatting Numbers
Next, you’ll want to format the right-hand column as currency. Select F19:F32, then click the $ (accounting number format) in the Home menu in the Number section.

Do the same for E19:E28.
Adding Protection to the Spreadsheet
Now that the format and formulas of your invoice are complete, you want to lock down certain cells so they aren’t inadvertently edited, thus breaking your invoice. You can do this by enabling protection on your spreadsheet. Before you enable protection, you need to unlock the cells where you want to enter data.
Select cell ranges A17:E28. Go to the Home ribbon and click Format. Look for Lock Cell. If it’s enabled, go ahead and click it to disable it.

Repeat the same steps for the following cell addresses and ranges.
- F6:F10
- F31
- A7:C10
- A13:C16
Click the Format menu, then Protect Sheet. By default, “Protect worksheet and contents of locked cells,” “Select locked cells,” and “Select unlocked cells” will be checked. Setting a password is optional and really not necessary in this case. Make sure these settings are selected and click OK.

Now, your spreadsheet will be locked down for editing except for the rows you’ve unlocked for entering data. If you ever want to make changes to your spreadsheet, click Format and then Unprotect Sheet…
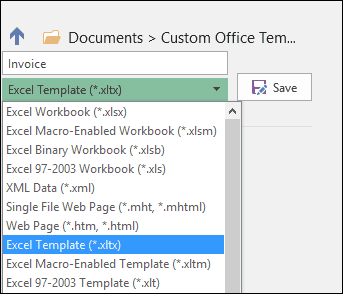
All that’s left for you to do now is save your invoice as a template, then take it for a spin. Click File > Save as… > click in the type list box, then choose Excel Template (*.xltx), then click Save.
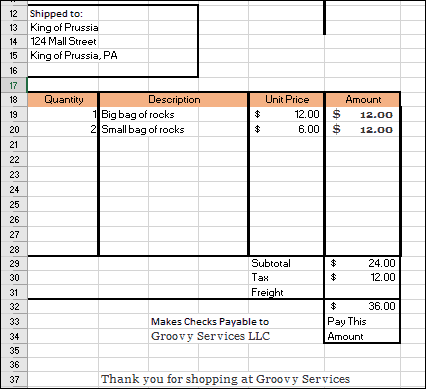
Every time you need to create a new invoice, you can just launch a template then enter your data. Of course, you might need to customize your invoice based on your specific needs and requirements, but doing so should be a breeze now that you know the basics of formatting and formulas.
If you are new to Excel or need to brush up on the basic functions of the popular spreadsheet, be sure to check out our previous article detailing the basics every new Excel user should know.
Hardeep Singh
October 29, 2016 at 6:49 am
Sounds good
Richard
November 11, 2016 at 1:59 pm
GREAT POST! EXACTLY WHAT I NEEDED…..MANY THANKS!